

1,安装emby
wget https://github.com/MediaBrowser/Emby.Releases/releases/download/4.6.7.0/emby-server-deb_4.6.7.0_amd64.debdpkg -i emby-server-deb_4.6.7.0_amd64.deb浏览器打开IP:8096
如果你还是打不开那可能是因为端口未开放的缘故 Ubuntu系统下打开端口
iptables -F或者
sudo iptables -P INPUT ACCEPT
sudo iptables -P FORWARD ACCEPT
sudo iptables -P OUTPUT ACCEPT
sudo iptables -F
或者

2、申请GoogleDirveApi
- 首先登录到 Google API console,创建一个应用,点击 “启用 API 和服务”,找到 Google Drive 并启用

2. 点击 OAuth 同意屏幕,用户类型选择外部,应用名称随便填写,比如 “rclone” 就可以。用户支持电子邮件和开发者联系邮箱都填写您自己的就可以,点击保存并继续,剩下的参数都是用默认就可以了。
3. 点击凭据,屏幕上方点击创建凭据,选择 OAuth 客户端 ID
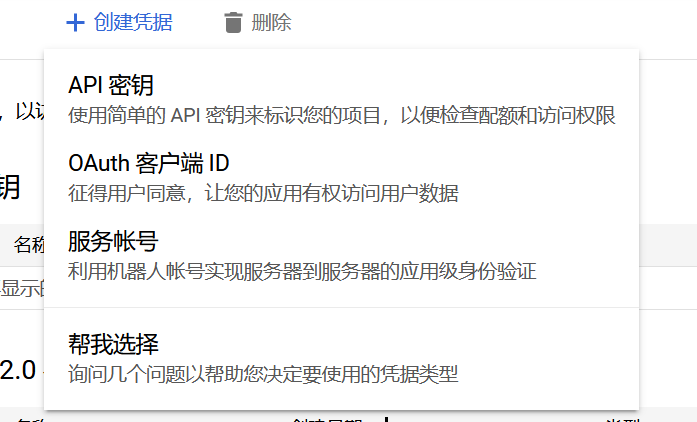
应用类型选择桌面应用。
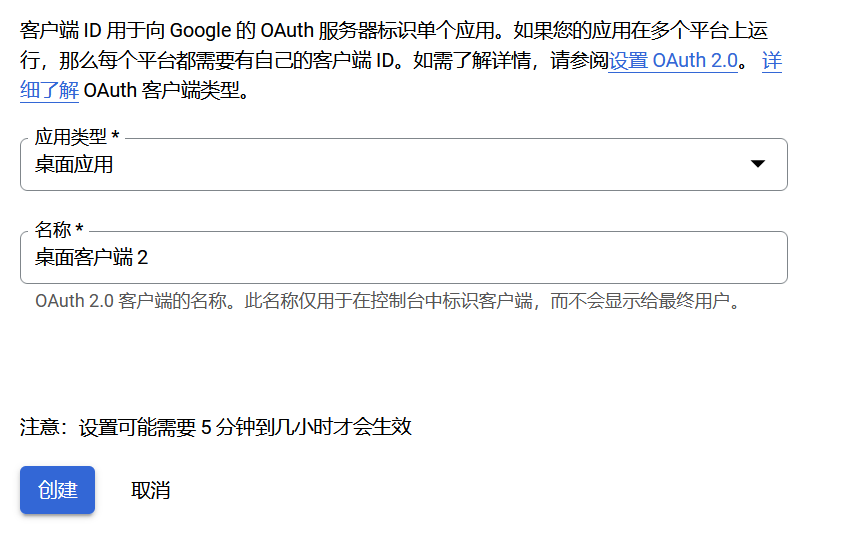
名称随便填,点击创建。创建后会向您提供您的客户端 ID 和客户端密码,务必记下这些数据,并且填写到 rclone 中。
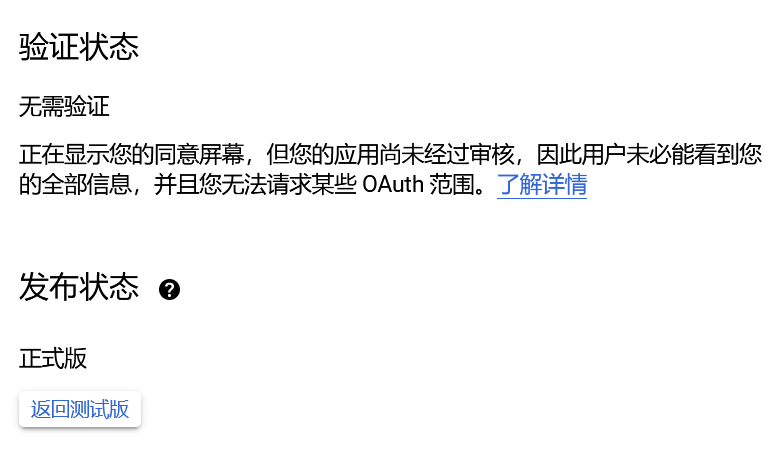
最后选择 OAuth 同意屏幕,选择发布应用。此时应该能看到发布状态变为了正式版。
至此 Google API 就申请完成了。
3、安装rclone
curl https://rclone.org/install.sh | sudo bashrclone configo remotes found - make a new one
n) New remote
s) Set configuration password
q) Quit config
n/s/q> n
name emby #随意取 但是后面的代码也会相应改变Choose a number from below, or type in your own value
#选谷歌 (16) 可能会因为版本的不同而改变 注意选择 Google drive
client_id> #填写刚刚申请到的api信息client_secret> #填写刚刚申请到的api信息Choose a number from below, or type in your own value
scope> 1 #选1 有最大的使用权限。ID of the root folder
Leave blank normally.
if this is blank, the first time rclone runs it will fill it
in with the ID of the root folder.
root_folder_id> #空,直接回车。空是根路径,如果想用别的路径作为挂载的根路径,在GoogleDrive网盘目录复制对应文件夹路径下的url链接地址的后缀id到此处(注:新版本此选项已经移至advanced config中)
service_account_file> #直接回车Edit advanced config? (y/n)
y) Yes
n) No (default)
y/n> n #不用别的高级配置(如需要指定网盘目录作为挂载根目录则需要高级配置)Use auto config?
Say Y if not sure
Say N if you are working on a remote or headless machine
y) Yes (default)
n) No
y/n> n #因为我们是vps操作,不能auto config,需本地手动获取tokenOption config_token.
For this to work, you will need rclone available on a machine that has
a web browser available.
For more help and alternate methods see: https://rclone.org/remote_setup/
Execute the following on the machine with the web browser (same rclone
version recommended):
rclone authorize "drive" "Your Token Code"
Then paste the result.
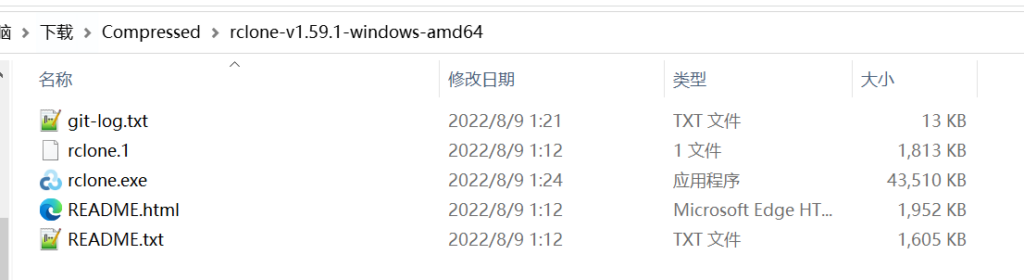
Enter a value. 在本地执行,下载win端rclone,解压
当前位置打开终端,执行 rclone authorize “drive” “Your Token Code”这一行。
此时自动打开浏览器进入到谷歌账号登录界面,此时一定要登录被挂载的谷歌账号,并选择同意授权。由于是新申请的 API,没有经过的谷歌的验证,所以谷歌会提醒该应用未经验证。但是左下角有一行小灰字,点击选择继续就能授权。
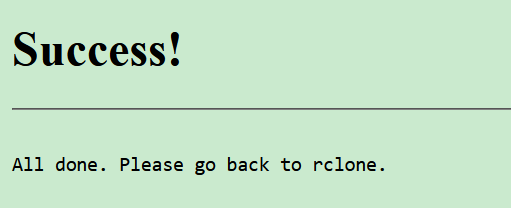
授权成功浏览器会提示 success:
此时返回命令行,等待几秒就能看见授权的 code 了。(如果timeout请设置将终端接入代理)
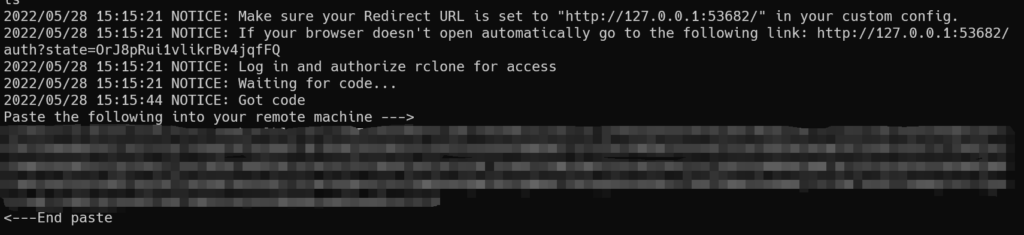
复制授权 code,输入到 rclone 中。
Configure this as a team drive?
y) Yes
n) No (default)
y/n> #根据实际情况选择
#如果选择团队盘
Choose a number from below, or type in your own value
1 / 二次元
\ "0AGfwXXXXXXXXXXXX"
2 / 电影
\ "0AXXXXXXXXXXXXXXX"
Enter a Team Drive ID>                    #如果你账号只有一个团队盘,则会显示对应ID让你确认,ID就是盘符页面对应地址                  栏上末尾的那串数字字母,注意核对一下。
y) Yes this is OK (default)
e) Edit this remote
d) Delete this remote
y/e/d> ye) Edit existing remote
n) New remote
d) Delete remote
r) Rename remote
c) Copy remote
s) Set configuration password
q) Quit config
e/n/d/r/c/s/q> q4.挂载
mkdir /google

rclone mount gdrive: /google --allow-other --allow-non-empty --vfs-cache-mode writes --daemon
#其中 gdrive 是 rclone 配置时输入的配置名称,/google 是挂载目录,–daemon 是指后台运行。
如果mount报错请安装这个
yum install -y fuse3

df -h #查看挂载是否成功
5、设置自动挂载
cd /etc/systemd/system/
vi rclone.service
写入
[Unit]
Description = rclone
AssertPathIsDirectory=挂载目录(启动该服务前断言是否存在)
After=network-online.target
[Service]
User = root
ExecStart = /usr/bin/rclone mount 配置名称:配置盘下的具体目录(可省略) /挂载目录 \
--umask 0000 \
--default-permissions \
--allow-non-empty \
--allow-other \
--buffer-size 32M \
--dir-cache-time 12h \
--vfs-read-chunk-size 64M \
--vfs-read-chunk-size-limit 1G
ExecStop=fusermount -u 挂载目录(停止服务时熔断取消挂载)
Restart = on-abort
[Install]
WantedBy = multi-user.targetsystemctl daemon-reload
systemctl enable rclone
systemctl start rclone
systemctl status rclone
systemctl stop rclonereboot #重启再次检查是否成功
systemctl status rclone
df -h6、安装bbrplus
执行一遍后再执行一遍选7启用bbrplus,再执行一遍确认已启用
wget -N --no-check-certificate "https://raw.githubusercontent.com/chiakge/Linux-NetSpeed/master/tcp.sh" && chmod +x tcp.sh && ./tcp.sh7、虚拟内存
安装内存的两倍即可
wget https://www.moerats.com/usr/shell/swap.sh && bash swap.sh8、 取消挂载
1 、 进入配置,在这个页面选择d,删除remote
e) Edit existing remote
n) New remote
d) Delete remote
r) Rename remote
c) Copy remote
s) Set configuration password
q) Quit config
e/n/d/r/c/s/q>
2 、 使用umount删除挂载
Current remotes:

Name                 Type
====                 ====
emby                 drive

e) Edit existing remote
n) New remote
d) Delete remote
r) Rename remote
c) Copy remote
s) Set configuration password
q) Quit config
e/n/d/r/c/s/q> d


root@alice:~# df -h
Filesystem      Size  Used Avail Use% Mounted on
xxxxxx          xxxx  xxxx  xxxx   x%   /xxx/xx
xxx             xxxx  xxxx  xx     xxx% /xx/xx
xxxxxxxxx       xxxx  xxx   x      x%   /
xxxxxx          xxxx  xxxx  xx     x%   /xxxx/xxxx/xx
xxxxxxx         xxxx  xxx   xx     x%   /xx/xx
xxxx            xxx   xxx   xxxx   xxx  /xxx/xxxx
emby:           1.0P  0     1.0P   0%   /home/gdrive
root@alice:~# umount /home/gdrive
本文参考链接:
https://github.com/bigdongdongCLUB/welcome/issues
https://blog.vwert.com/CloudStorage/Emby-GoogleDrive.html
本文主要用于记录别人挂载GoogleDrive的流程,举一反三来尝试挂载OneDrive,现已参考本方法成功挂载上OneDrive,如访问者有关OneDrive挂载上的问题可以在下方留言,对于挂载GoogleDrive的相关疑问可以去如上链接中询问。
Comments NOTHING